Whenever we work with homeowners to redesign their kitchen or primary bathroom, it’s almost inevitable that at some point during the process they’ll ask, “what would you do?” While they are asking for our expertise based on what we know abouttheirspecific needs and desires, and not what we as designers would choose personally, we know that most of our clients are curious about our personal choices when it comes to our own homes.
Have you ever been curious about what a general contractor and a kitchen and bath designer would choose for their own house? Now’s your chance to find out! Last spring, we (Brad and Chelsea – yes we’re married!) bought a new house with the intent to pursue an immediateprimary bathroom remodel, with plans to complete the rest of the downstairs, including the kitchen, in a second phase at a later date.
What Was Wrong with the Primary Suite?
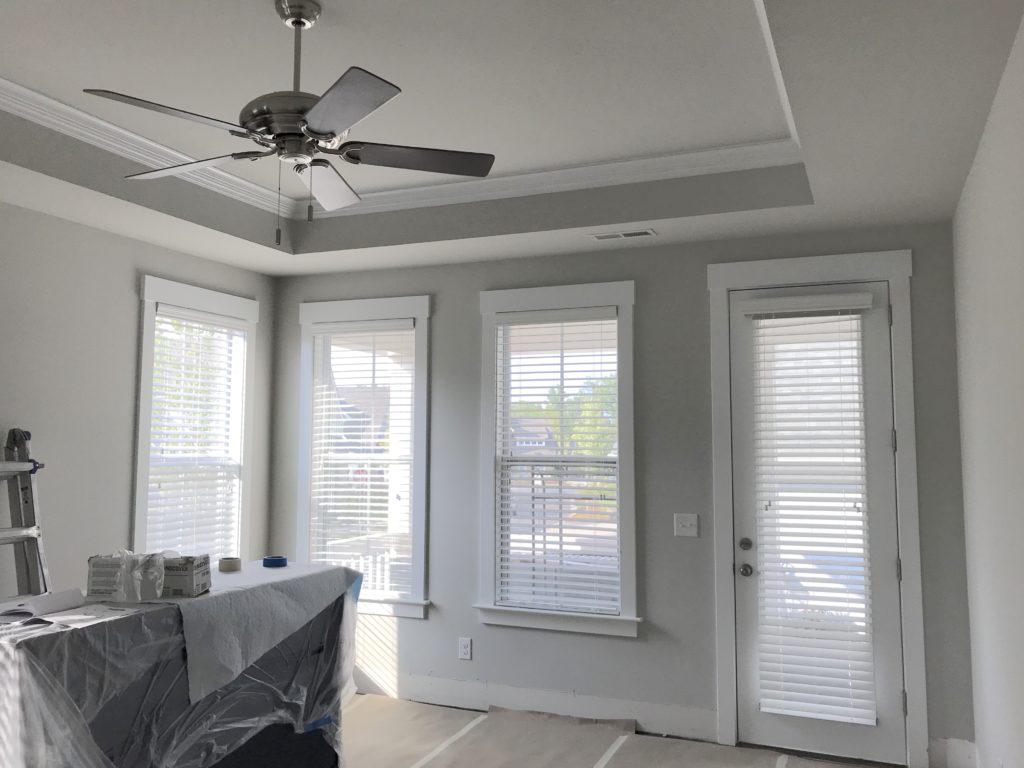
When you buy a house that wasn’t custom-built for you, there are bound to be functional adjustments that need to be made for the way you live. The original primary bedroom had brown carpeting and a door to the back porch that we knew we would never use, which threw off the symmetry of the back wall and limited furniture placement in the room.
BEFORE: The door was unnecessary, there were too many windows, the crown wasn’t scaled proportionally for the tray ceiling and the fan was an eyesore.
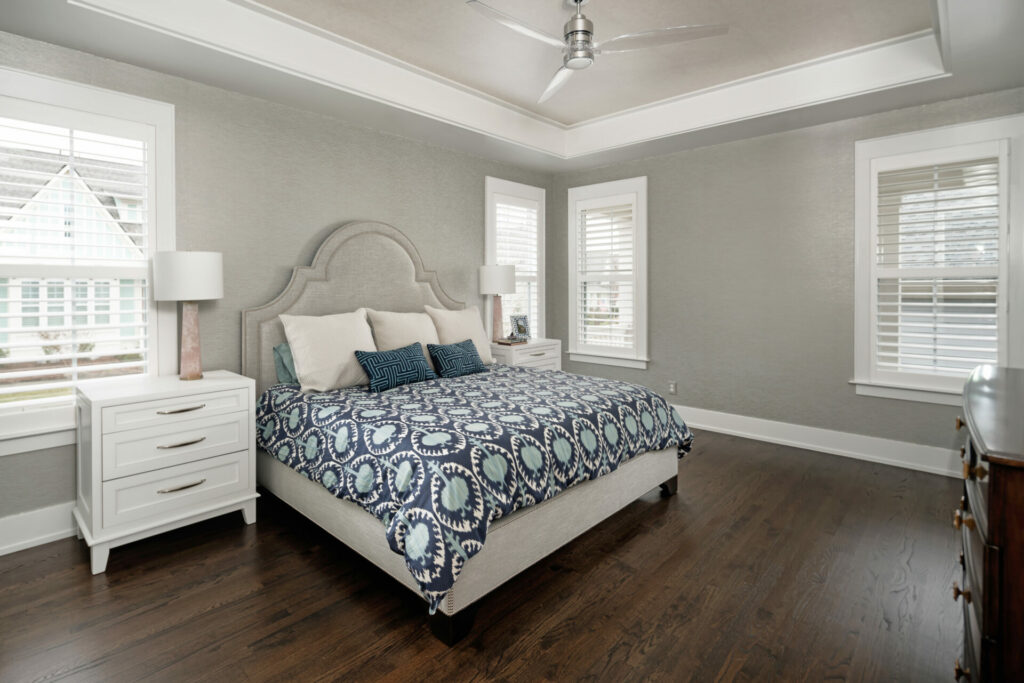
AFTER: The walls and ceiling are now dressed up with two shimmery wallpapers to reflect light and create a soothing atmosphere. Simple crown molding and a completely painted soffit bring more attention to the tray ceiling which houses a less noticeable clear acrylic ceiling fan. We’ve since added artwork to the walls, and a custom Stark rug to anchor the furniture.
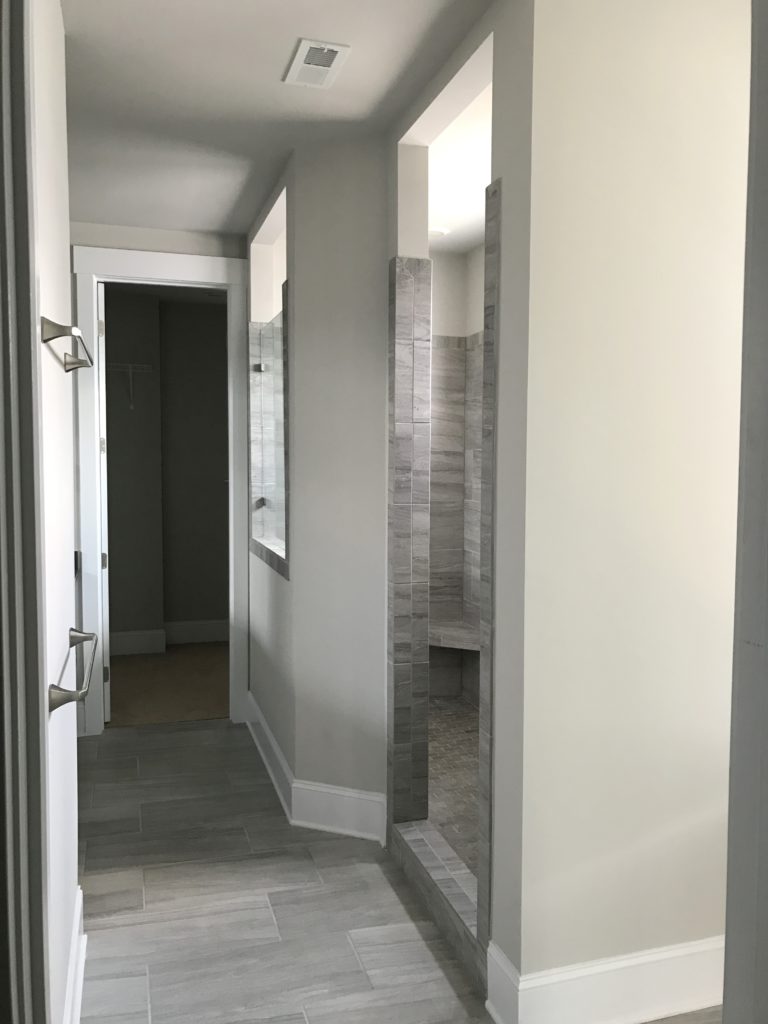
The primary bathroom was dark, and felt much smaller than its true size, as a large walk-in shower took up most of the floor space. The transom windows in the shower faced opposite the vanity mirrors, so without window treatments, the neighbors across the street could look out their second-story window and see into theprimary bathroom.
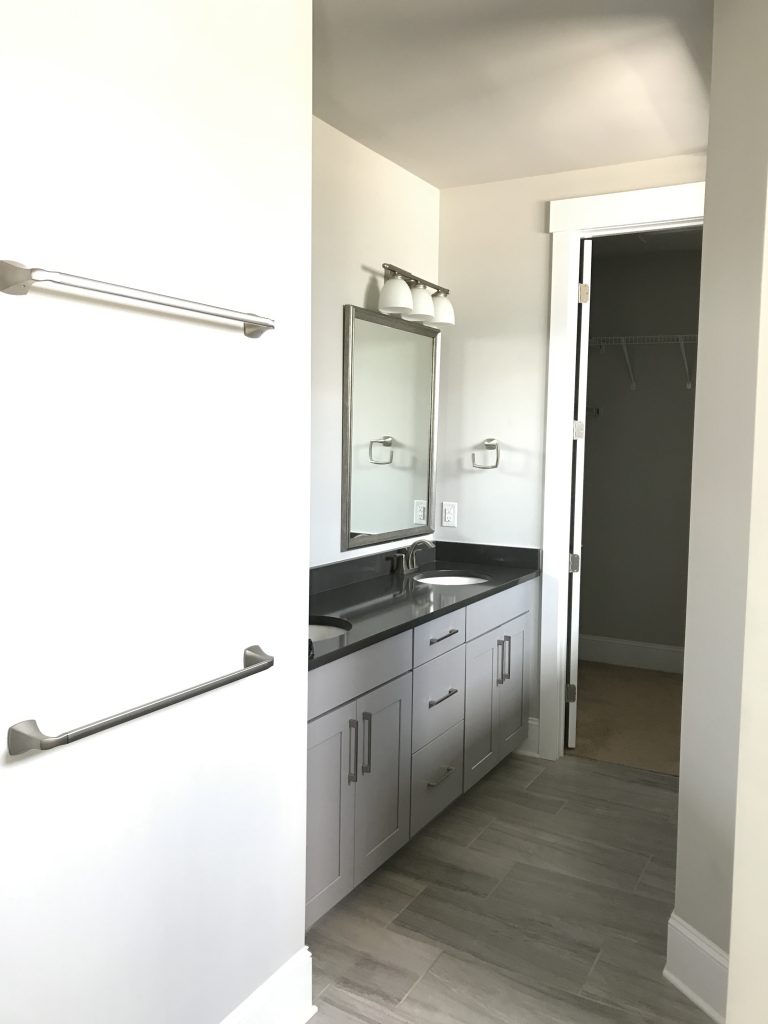
The original space was also missing a hand-held showerhead – a nightmare for trying to clean anything – and instead featured four body sprays, which use an enormous amount of water. The vanity only had three drawers (which isn’t ideal if you want to limit the arguments in the bathroom when sharing space with a spouse), and there was no place for storing extra toilet paper in the water closet.
BEFORE: The awkwardly shaped shower took up the majority of the footprint of the bathroom
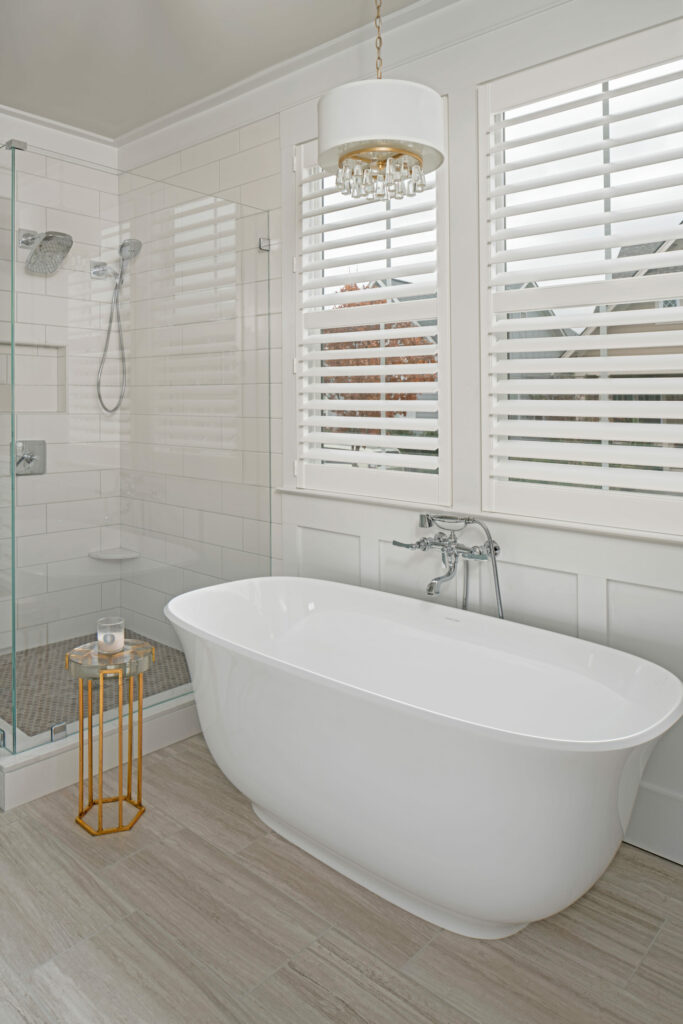
But the biggest problem behind the design of this primary bathroom? No bathtub. While many people never use a bathtub and much prefer a larger shower, we determined we wanted to have both. Since going upstairs to the tiny tub/shower combo in the kids’ bathroom was a deal-breaker, we decided that either the bathroom would get remodeled immediately to make space for our dream soaking tub, or we weren’t moving – it wasthat important.
Luckily, a 66” freestanding tub would fit and still allow ample space for a decent-sized shower, but it would require removing and replacing all three windows, patching the siding and completely repainting that side of the house, and securing HOA approval. No big deal!
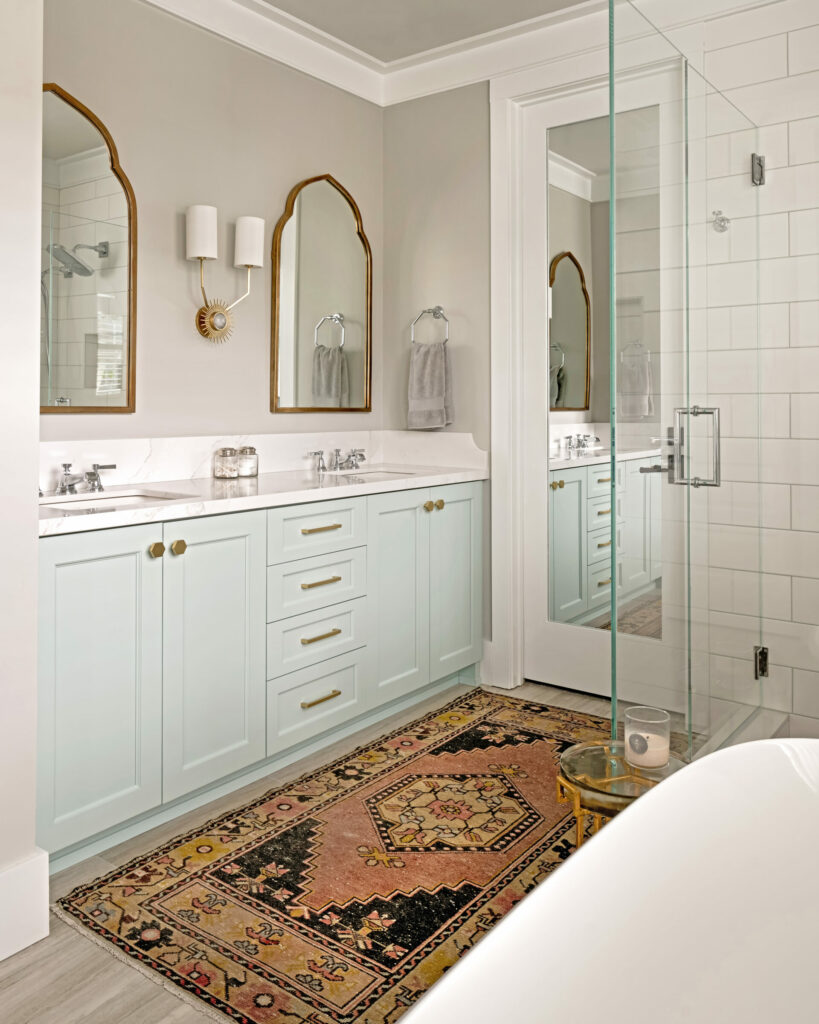
BEFORE: False drawers and dark finishes gave the vanity feel like a cluttered, heavy appearance.
Working with the Existing Layout
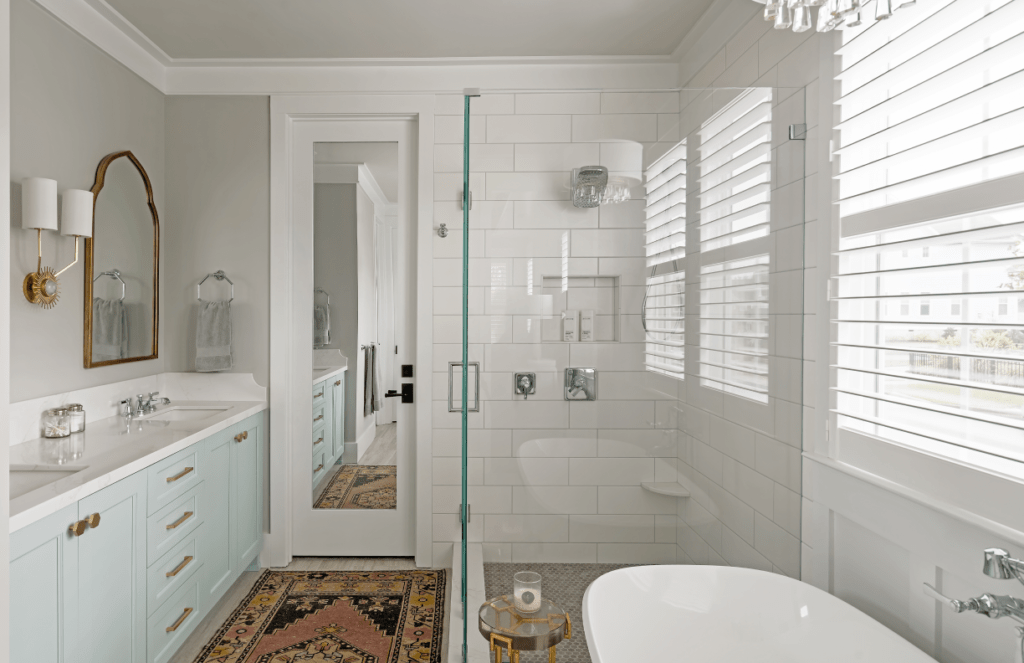
Due to the placement of the walk-in closet, laundry room, and stairs, the overall layout had to stay the same, but the shower was drastically reduced in size to make space for the freestanding tub. We set back the shower curb a few inches from the closet door casing to make more space in front of the vanity, with the frameless glass shower enclosure making the space feel more open and spacious.
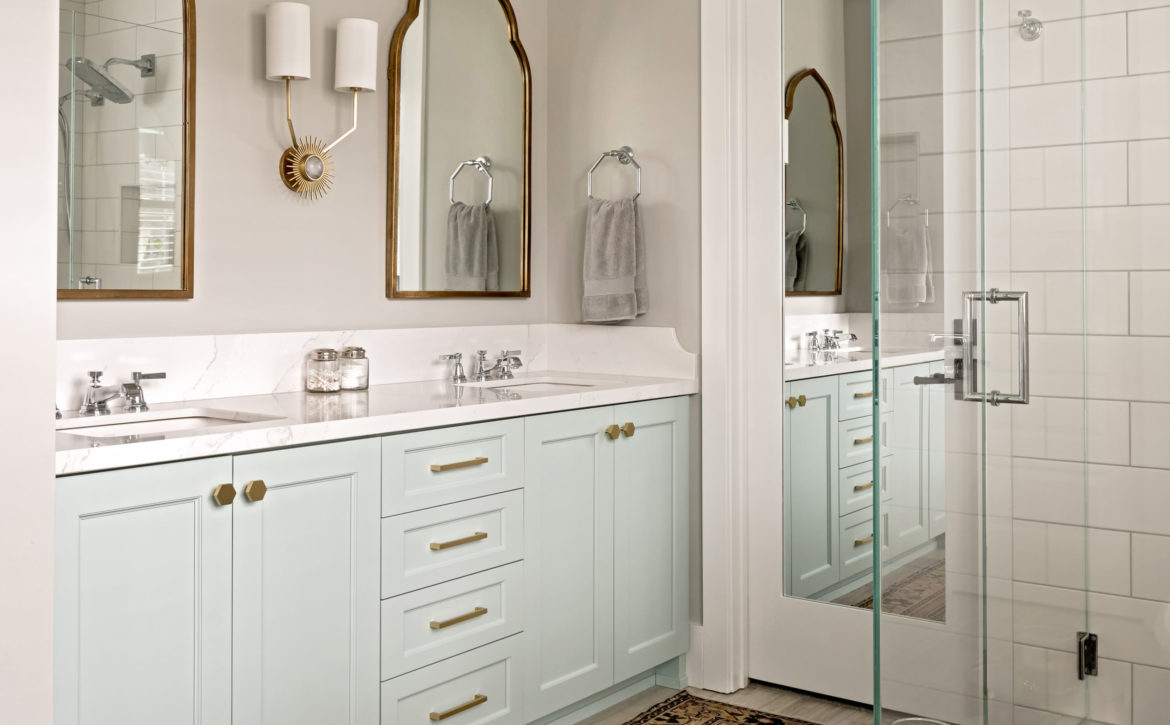
New frameless cabinets in Annapolis Green by Benjamin Moore feature full height door sink cabinets with roll-out shelves inside for easy access. Frameless cabinet construction providesmore storage space than framed cabinetry, which is always welcome in a small space. A shallow, matching wall cabinet was placed over the toilet in the water closet to house extra supplies.
Primary Bathroom Materials
Our inspiration started with the turquoise vanity and brushed brass hardware pulls — the rest of this primary bathroom remodel took off from there. The counters, shower curb, and foot prop are made of Silestone quartz that has all the beauty of Calacatta marble but none of the maintenance. The subtle gold veins coordinate with the brass metal tones throughout; since the turquoise vanity anchors the room, we made sure the remaining materials and finishes were neutral.
AFTER: Don’t ever expect gold-toned finishes to match across brands. The brushed brass sconce, mirrors and cabinet hardware are all different finishes, but because they’re in the same family they coordinate. Plus, the slight variation prevents the space from appearing too matchy-matchy.
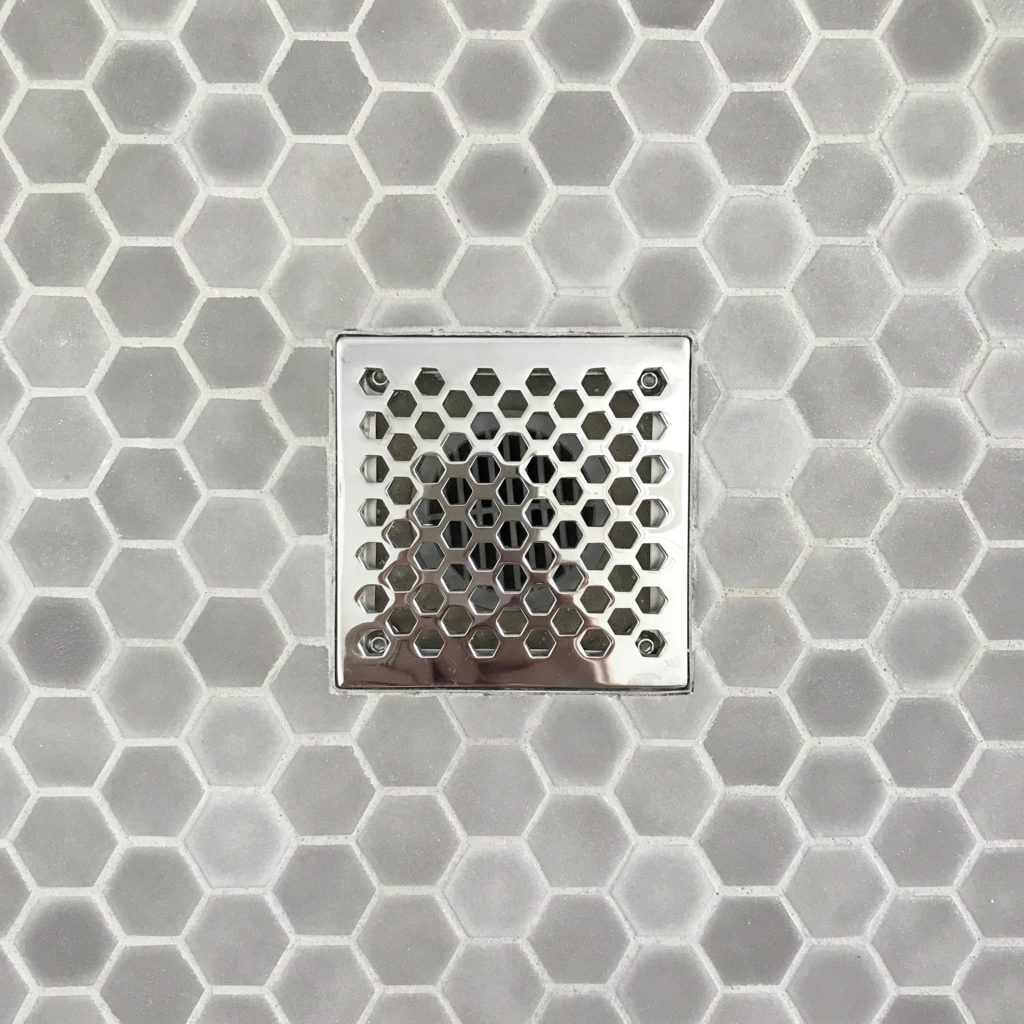
We chose a 12 x 24” porcelain from Dal-tile that looks exactly like a vein-cut limestone. Not all limestones are suitable for wet locations, and we didn’t want to deal with the maintenance of natural stone. Instead, we used a large format 6 x 18” ceramic tile with a white eggshell finish in the shower. The larger size meant fewer grout joints and the eggshell finish does a remarkable job of hiding water spots between cleanings. A 1” hexagon mosaic tile with a slight non-slip texture makes the perfect surface for the shower floor. The finish it off, we installed shower drain cover from Newport Brass with a hexagonal motif that coordinates perfectly with the surrounding tile. Nothing needs to be generic, even shower drains!
AFTER: This decorative shower drain plate from Newport Brass repeats the same hexagon shape from the floor tile and cabinet hardware.
Plumbing Fixtures
The plumbing was one of the easiest parts of this remodel – when it’s your own bathroom, you’re able to use your favorite things! In this case, we included theVictoria and Albert Amiata tub, for its clean and graceful profile. The propriety material is heavy, so it feels substantial when you’re inside it and it doesn’t bounce like thinner acrylic models sometimes do.
We chose the Kohler Pinstripe faucet suite for its classic, slightly masculine lines — and if we’re being completely honest the octagon-shaped hand towel rings. Even though chrome is a classic finish that goes with everything, we would have preferred polished nickel fixtures. Unfortunately, the Hansgrohe shower heads (a non-negotiable for Brad due to their raindance technology) were only available in chrome, so chrome it was. An advantage to using a chrome-like finish is that you can mix and match manufacturers to get exactly what you’re looking for. Not all plumbing suites have every configuration, so knowing which ones we could mix and match easily was key to using parts from several manufacturers.
AFTER: The board and batten paneling next to the shower tile creates a wall of white, making the space feel larger and more continuous. Every freestanding tub needs a ledge or a table for products.
Since the Pinstripe line didn’t have a wall-mounted tub filler, I found one of comparable quality by Brizo that coordinated well. It has a similar escutcheon to the Pinstripe faucet, and lever handles. Since they’re not right next to each other, you’d never notice they weren’t the same faucet suite.
A Bathroom Remodel Without Challenges? Not Even for The Pros
We’d love to say that because we were the “clients”, everything went off without a hitch, but construction doesn’t discriminate — there will always be stress and there will always be delays, no matter how well you plan. Even we had to deal with a missing part and some damaged materials. One side of the house was without siding, exposed to the elements the day before the rains from Hurricane Florence hit! Luckily our team got the siding up just in time so we didn’t have to worry. Our house was a dusty construction zone, and not wanting to have our new custom upholstered bed delivered before or during construction, we slept on a mattress upstairs on the floor for four months while we planned and executed the project. It was not glamorous. Remodeling is uncomfortable, but a few weeks or months of discomfort is worthyears of enjoymentlater.
AFTER: Even with the plantation shutters, our bathroom is now filled with light and feels spacious and relaxing. Swapping out a standard door for a mirrored door is a great way to incorporate a full-length mirror when you don’t have the wall space to hang one.