Your Comprehensive Guide to Grout: Tips, Tricks, and So Much More!
Ah, grout – the unsung hero of the tile world. It may not be as glamorous as the shiny, colorful tiles it holds in place, but grout plays a crucial role in keeping our floors and walls looking good and lasting longer. And yet, how often do we really give it the attention it deserves? Let’s face it, grout can be a real headache to deal with. From moldy spots to stubborn stains, it can seem like a never-ending battle to keep it clean and fresh. But fear not. In this blog, we’ll dive deep into the world of grout and learn everything we need to know to keep it in tip-top shape.
Where To Begin in My Grout Journey?

If you’re new to the world of grout, the first step is to understand what it is and why it’s important. Grout is the material used to fill the gaps between tiles, providing stability and preventing them from shifting or cracking. It’s typically made of a mixture of cement, water, and sometimes sand or colorants. It also helps to prevent moisture from seeping underneath the tiles, which can cause damage over time. In addition to its functional properties, grout can also be used for decorative purposes, as it comes in a variety of colors and textures that can complement the aesthetic. While grout may seem like a minor detail, it can greatly impact the overall appearance and longevity of your tile installation. So, whether you’re planning a new tile project or looking to give your existing tiles a refresh, learning the basics of grout is a great place to start your journey.
Here are a few important items to consider:
1. Type of Tile
The type of tile you are using will play a big role in determining the type of grout you should use. For example, if you’re using natural stone or glass tiles, you’ll need to use a non-sanded grout to prevent scratching or damage. As a further example, marble tile should always get unsanded grout because sand would scratch it.
2. Grout Width
The width of the grout lines can greatly affect the overall look of your tiles. Narrow grout lines can create a sleek and modern look, while wider grout lines can give a more traditional or rustic appearance. Ideally smaller looks better and is easier to maintain long-term, but an irregular or handmade tile will require a thicker joint than something smaller or that has a rectified edge (ie: perfectly square). Ultimately the thickness is determined by the tile material itself.
3. Grout Color
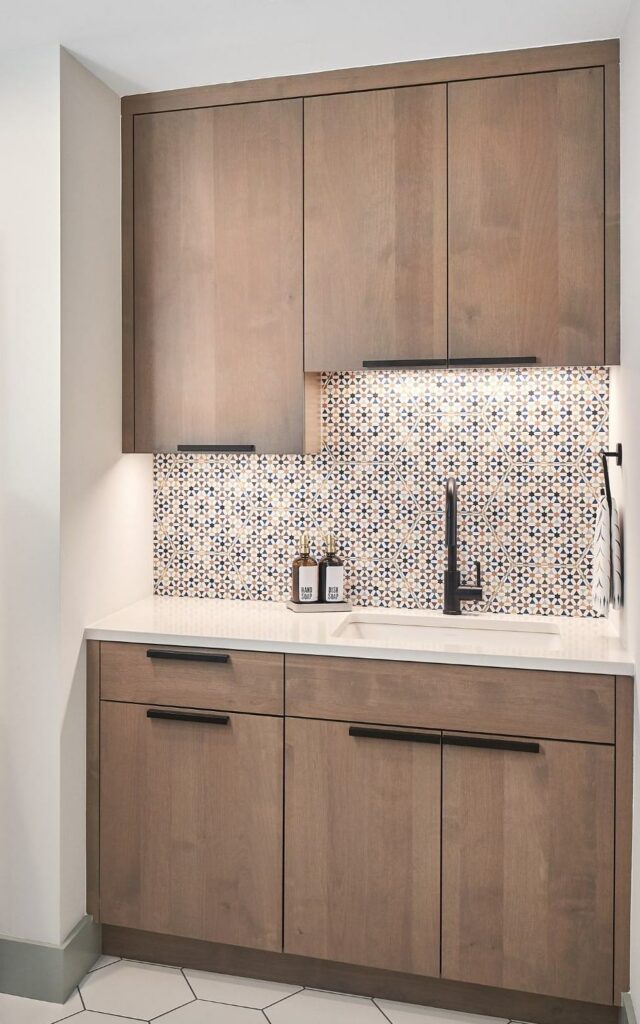
Choosing the right grout color is crucial to achieving the desired look for your project. You can either choose a grout color that blends in with the tiles for a seamless look or go for a contrasting color to make a bold statement.
4. Maintenance
Different types of grout require different levels of maintenance. For example, epoxy grout is highly resistant to stains and mold, making it a great choice for high-traffic areas or bathrooms, but it’s more expensive and can be tricky to work with. Sanded or unsanded grouts with built-in sealers are an excellent alternative.
5. Application
If you are going to put money into your home, it ought to increase your home value. Whether you are considering selling your home in the near future or not, adding value to your home is never a bad idea. Double vanity sinks are highly sought after and can add significant value to your home.
You know what they say – bathrooms and kitchens sell homes! When potential homebuyers are touring a house, they look for both function and beauty in bathrooms. A double vanity bathroom offers both of those things.
What Are the Types of Grout?

There are three types of grout to choose from:
1. Sanded Grout
Sanded grout is a cement-based grout that contains fine sand particles, making it ideal for use with wider grout joints (typically 1/8 inch or larger). The sand particles help to prevent the grout from shrinking and cracking as it dries, and they also provide additional bonding strength. Sanded grout is commonly used for ceramic and porcelain tile installations, and it comes in a range of colors.
2. Unsanded Grout
Unsanded grout is also a cement-based grout, but it does not contain sand particles. It is ideal for use with smaller grout joints (typically 1/8 inch or less) and with delicate tiles such as marble or glass that may scratch easily. Unsanded grout is less durable than sanded grout and is not recommended for use in high-traffic areas. It also tends to be more expensive than sanded grout, and it can be more difficult to apply.
3. Epoxy Grout
Epoxy grout is a two-part grout system that consists of a resin and a hardener. It is highly durable and resistant to stains, moisture, and chemicals, making it ideal for use in areas such as kitchens and bathrooms. Epoxy grout is also highly resistant to cracking and shrinking, and it does not require sealing. It comes in a range of colors and can be used with both sanded and unsanded grout joints. However, as mentioned above, epoxy grout is more expensive than cement-based grouts, and it can be more difficult to work with due to its short working time and the need to mix it properly.
Speaking of Grout Color, How Should I Choose?


1. Consider the Size of the Room
If you’re working with a small room, using a lighter colored grout can help make the space feel more open and airy. On the other hand, if you’re working with a large room, you can go for a darker colored grout to create a more dramatic effect.
2. Look at the Tiles
Take a close look at the tiles you’ve chosen for your project. Are they neutral or bold? If they’re neutral, you may want to choose a contrasting color for the grout to add some interest. If they’re already bold, you may want to opt for a more subdued grout color.
3. Think about Maintenance
Keep in mind that lighter colored grouts will show stains and dirt more easily, so if you’re concerned about maintenance, you may want to choose a darker colored grout. On the other hand, if you have really hard water, the minerals in the water may build up in wet areas and be more obvious with a dark grout color.
4. Test Samples
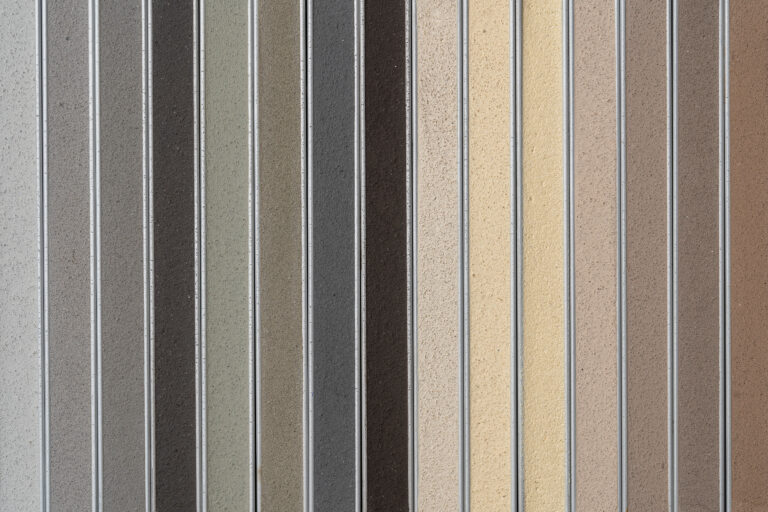
Don’t be afraid to test out different grout colors before making a final decision. You can purchase plastic or paper grout samples and try them out in small areas to see how they look with your tiles and in different lighting.
How Do I Go About Choosing Grout Size?
The size of the grout a homeowner should choose depends on the type of tile they have and the look they want to achieve. The most common sizes for grout are 1/8 inch, 1/16 inch, and 3/16 inch.
A larger grout joint size, such as 3/16 inch or greater, is generally recommended for tiles that have uneven edges, irregular shapes, or natural variations in size. This is because a larger grout joint can help to even out the variations and create a more consistent look.
For tiles that have straight edges and are uniform in size, a smaller grout joint size, such as 1/8 inch or 1/16 inch, can be used to create a more seamless and modern look.
It’s important to note that the grout joint size should also take into account the tile layout and the amount of space available for grout. Additionally, the grout color can also affect the overall look of the tile installation, so homeowners should carefully consider their options before making a final decision.
What Type of Grout Cleaner Would You Recommend?
Cleaning grout can be a tough task, but there are several effective methods you can use to get the job done.
One method is to mix baking soda and water to create a paste, apply it to the grout lines, spray vinegar on top, and then scrub with a brush before rinsing with water. Another approach is to mix hydrogen peroxide and baking soda to form a paste, apply it to the grout lines, allow it to sit, and then scrub with a brush before rinsing. You could also try using a steam cleaner with a grout attachment to blast away dirt and grime from your grout lines. The caveat is that nothing acidic or abrasive should ever be used on natural stone such as marble, as it will ruin the stone–and never use bleach!
Alternatively, there are many non-toxic, mild cleaners available on the market that can effectively remove dirt and stains from grout with a little elbow grease. The easiest solution is to choose a grout with a built in sealer to protect it, but know that it will still need to be cleaned regularly. When it comes to wet areas like your shower, remember that mold grows on soap scum and dead skin cells, not on the grout. Rinsing your walls and shower floor really quickly with a handheld shower, followed by a quick pass with a squeegee will do wonders for prolonging the life of your grout while reducing how often you need to clean it.
Regardless of the method you choose, always test the cleaning solution on a small, inconspicuous area of your grout first to ensure it doesn’t cause any damage or discoloration.
What Should I Do if My Grout Cracks or Needs Repair?
If a homeowner notices that their grout has cracked, the first thing to do is to check if the warranty window is still valid. If the tile work is subcontracted out to tile installers, the homeowner can have them come out and repair it within the two-year warranty window.
In some areas where two planes meet, like between a shower wall and shower floor, or between a backsplash and countertop, color matched sanded or non-sanded caulk is used to prevent cracking. If the cracking is minimal and not widespread, the homeowner can apply color-matched sanded or non-sanded caulk (whichever matches the grout) to fix the issue. This helps those joints expand and contract with the natural expansion and contraction of the house throughout various seasons. However, if there is a ton of cracking, it may indicate underlying foundational issues or home settling.
In this case, it is best to have a professional evaluate it. It is important to note that in a shower, as long as the membrane of the shower hasn’t been compromised, cracked grout does not necessarily equal water damage.
Final Thoughts On Grout

As our guide to grout comes to a close, we leave you with a few of our favorite tried and true tips for choosing the best grout for your upcoming remodeling project.
- When updating the tile in a room where tile and grout already exist, it’s important to choose a new grout color that closely matches the existing one. This will help maintain a cohesive flow in the room and make the new tile appear as though it was intentionally designed to be a part of the space, rather than a recent addition, but know that it’s very unlikely to match.
- It’s important to make your final selection of grout color using grout sticks rather than relying solely on printed color charts.
- It’s recommended to choose your grout at the same time you are choosing your tile – that way there are no surprises.


